Usually, our Support and Training team sets up your subjects when you join Pupil Asset during your initial consultation. However, schools can make small changes on their own.
To modify your subject settings, you must be an Admin or a higher-level user.
Here's how:
1. Go to Admin > School Options.
2. From the left-hand menu, select "Subjects."
The Subjects table will appear, showing various settings. Be cautious about changing these settings without first contacting Pupil Asset Support to discuss the possible consequences.

Some useful changes that Admin and AdminPlus users can make themselves are described below. After these changes have been made, users will need to click Save at the top of the Subjects table.
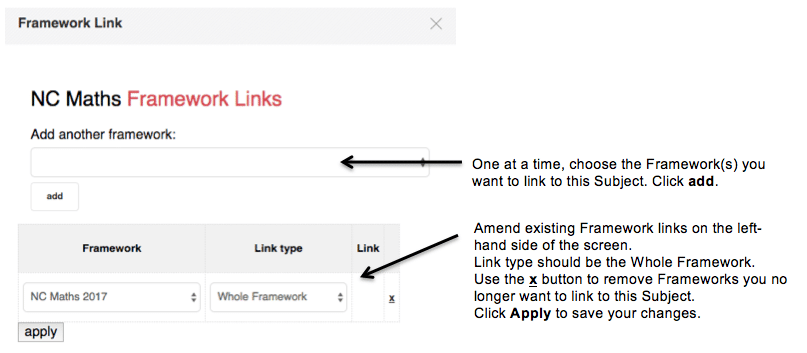
Linking formative Frameworks and summative Subjects
On the DNA Ticks page of Pupil Asset, teachers can view Frameworks in overview (on the left hand side of the screen) and input grades for an associated Subject (on the right hand side of the screen). This set-up is specifically designed for schools wishing to use formative assessment to help inform their summative judgments.
To add or change a link between Frameworks and Subjects, press the +/- button under Framework(s) on the Subject table.
Changing the name of a Subject
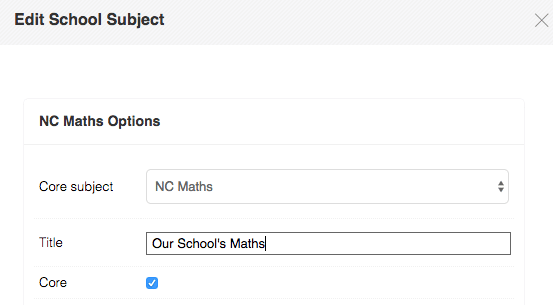
This allows users to keep the Core Subjects as e.g. NC Maths, but view the Subject as e.g. My School Maths throughout the rest of the system.
Click Edit for the relevant Subject within the Subjects table. For Title, type in the Subject name that you want to appear within the Pupil Asset system.
Then press Save at the bottom of the window.
Making a subject Core
To prevent users becoming overwhelmed by data, Multi-Subject pages on Pupil Asset show Core Subjects as the default subjects when first loaded.
Other Subjects can, of course, be added to the screen within the Display Options.
If a school needs to routinely enter and analyse data for a particular subject, it is worth making it a Core Subject.
Click Edit on the relevant Subject within the Subjects table.
Tick the Core box under Title.
Click Save at the bottom of the window.
Adding a new subject
Click Add Subject at the top of the page.
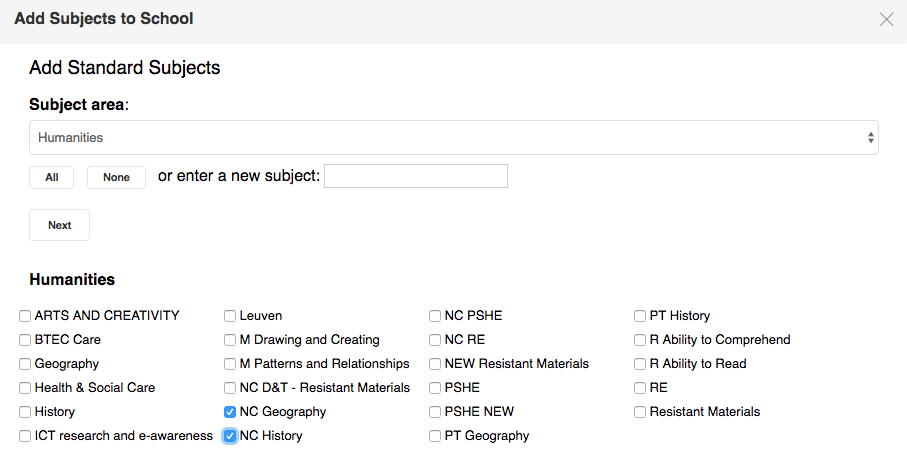
Select the appropriate Subject area from the drop-down list at top of the window, then tick the subject(s) you want to add. It is a Pupil Asset convention to use subjects with the NC prefix to track the New National Curriculum (2014) and to use subjects without that prefix (e.g. History, Geography) to store legacy levels data.
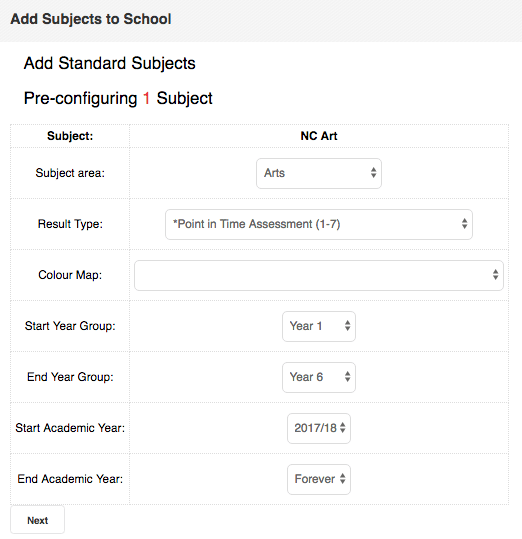
1. Click "Next" to begin setting up your new subject.
2. Choose the same "Result Type" used for existing subjects in your school or select a new one.
Note: Some result types, like "Point in Time Assessment" don't require a colour map; leave the Colour Map field blank if applicable.
3. Once you've selected the Result Type, click "Next"
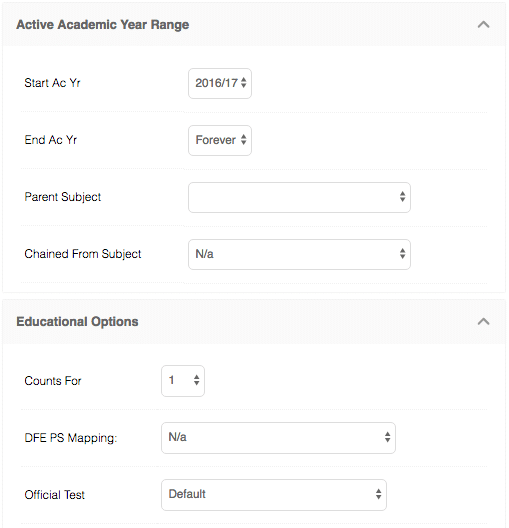
4. In most cases, this is sufficient for setting up your new subject. However, for advanced options, click the subject's name in the Subjects table (the underlined name).
5. This will open up additional choices, including adding a Tick Map, DfE Points score mapping, Parent subject, or Chained from subject.
Updated